Showing posts with label home studio. Show all posts

Mar 10, 2009

Dual Purpose Dining Table

I never look at things in a conventional way so when deciding on the right desk to desk to put in my new office I dug out an antique dining table that had been sitting in the garage since last summer. My dad actually picked this table up at a garage sale for me for $15...bargain hunting obviously runs in the family. I loved it but didn't have a use for it at the time.

After a couple quick coats of pinkish paint (my own mixture of mistinted paints...I love those!!!) it was ready for use. However, it was a bit smaller then I wanted but luckily I had hung on to a large piece of glass I found at Pottery Barn during their annual University Village Sidewalk Sale for a mere $5. (The U Village sale is a must visit... I haven't been able to find the 2009 dates yet but it is typically in mid-late June) Actually, if you want to get technical the glass was free as it also came with 2 other pieces intended for side tables that I sold at a past garage sale for $5. Anyway, the glass was the perfect fit and I now have a new desk for less then $25!!! That includes the piece of wrapping paper I placed under the glass for another pop of color.

The best part of this desk (table) is that it has four extra leaves and even another set of legs for the center which make for a super long table just perfect for the occasional large gathering...got to love dual purpose pieces!!!

Mar 2, 2009

How to Make a Corkboard...the Hard Way

As I started to mull around ideas for decorating my new home studio I was reminded of a couple yards of fabric that I've been hoarding in wait for the perfect project and decided this was the time to use it.

I love florals and this fabric was very complimentary to my much loved chandelier that had been previously installed.


After much debate about what to use my fabric on I decided on a corkboard. I've seen a number of DIY articles about covering a pre-made cork board (like here and here) and figured that would be a great tool for keeping me organized. I couldn't be content with simply covering a premade board though as I had my heart set on using an ornate 2 x 4 frame that I had picked up at an estate sale for $5.00.


I searched high and low for a roll of cork or even squares of cork...seriously where does one find these? I've seen them used on DIY shows before but after trying Lowes, WalMart, Walgreens and even the dollar store I came up empty handed. I finally recieved a tip from my sis-in-law that led me to the office supply section at Fred Meyer where I found a roll exactly 2 x 4 which was perfect!

I wish I would have taken more pictures of the process but I will do my best to explain it well. I started out by spray painting my frame a choclate brown ($1 brown spray paint from walmart) then where there used to be a strip of ribbon I decopauged some gingham paper.

I set that aside to dry then cut out a piece of backer board the size of the opening of my frame and attached the cork to it with spray adhesive. Sadly I think the cork I bought was a bit too old as it was quite brittle and cracked a few times but in the end it didn't matter as I cut out a piece of my floral fabric a little larger then my backer board, spread it out over the corkboard/backer board, wrapped it around the edges and attached it with hot glue on the back. Nope it's not pretty...but no one was supposed to see it ;0)


I wanted a little more embellishment so I crisscrossed vintage binding over the board at measured out intervals, pulled them taut and secured them with small thumbtacks.


I then secured the corkboard into the frame with a strong wood glue and a little hot glue to keep it in place until it dried. Lastly I added a couple picture frame hooks on the back and now it's ready to install!!!


P.S. One mistake I made in the process was using a backerboard that was so stiff that thumbtacks would not penetrate the surface easily. I ended up using sewing needles instead and much to my suprise they hold things really well and honestly I think they are kind of a cute twist on the average thumbtack. Anyway, if I were to do it again I would actually suggest using a couple sheets of cardboard or foamboard instead of the backer that I used.


Happy Creating!

Feb 25, 2009

Phase 3 - A Place for Everything & Everything in it's Place

After sorting everything into it's respective category I went about finding the perfect size container for each grouping of items. Of course many items fit nicely into the drawers and cabinets in my extra large hutch.


The shelves were great for my magazines,...

scraps of fabric...

and a variety of vintage trims.
I found some cute little wood baskets for storing bits of sewing trim and such at Ross which I hope to stencil descriptions on in the decor portion of my studio makeover.
Some more generic baskets were the perfect size to tuck under the lower portion of my cabinet and held much larger quantities of things.

And of course my vintage expandable sewing box is now brimming with goodies that I found around the room...might be time to start using some of those!

This little cabinet was a $20 find at an estate sale...I love all it's shallow drawers with the tag holders on the front. It had been floating around my home in hopes of finding the perfect place to land and I believe this is it. It is ideal for paper and as you can see my printer/scanner tucks in right on top and underneath my fabric shelves.


Now speaking of fabric...yikes I have a lot!!! A local fabric shop was kind enough to give me some empty bolts that they were planning to discard. It never hurts to ask and my large amounts of yardage are now tucked safely in a basket neatly rolled on these cardboard bolts.


Then I found this vintage gold display shelving that was just right for all my smaller amounts of yardage.


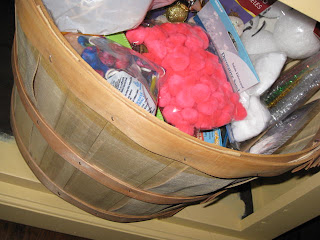
Lastly, I put a vintage fruit basket to use for all my hankies, doilies and scraps of fabric.


So nice to have this tedious part of the process over!!! It feels so good to have a place for everything. Now I can't wait to get started on my favorite part of the process Phase 4 - Making Things Pretty. And as I teaser I leave you with a sneak peek into one of my first projects that is the jumping off point for my color scheme.


Jan 27, 2009

Studio/Office Inspiration

I know I should be busy putting "everything in it's place" but I am so excited about the decorating portion of my office that I had to take a moment to share some other work spaces that have inspired me.

I'm sure no one would expect The Farm Chicks home office to be anything less then absolutley darling, full of bright colors and cute prints. I really love some of their great ideas for labeling and organizing.

Heather Bullard has a great home studio full of trinkets, baubles and cute little accesories. I'm afraid I'd be too distracted in this space admiring all the pretty things and never get anything done though!

Lola B's office is so tranquil and calming. I can certainly see myself spending a lot of time sitting in that gorgeous chair of hers flipping through Country Living magazines with a good cup of coffee in hand.

I'd have to say that my overall favorite space though is by Kim at Dear Daisy Cottage. You can view some of her office pictures here. I absolutley love everything she has done! The colors, the patterns, the style is so me and she even has a cup with my intial on it! Forget redoing my office I think I'll just move in there. :0)

Do you have a space that inspires? Would love to see it...leave a link and I'll be sure to check it out.

Phase 2 - The Purge

Well it has taken me two long evenings to dig my way through the mess in my soon to be studio/office. After removing most everything from the room I was glad to see it was much bigger then I remembered and believe it or not I had a small desk, chair and rug underneath it all.

I was suprised at a lot of the little things I found along the way and said to myself many times "so that's where this has been hiding", "hmmm...what does this belong to?","I kept this why?" Needless to say I had a number of things to throw out, many neat items to add to my annual spring garage sale and a lot of organizing to begin. I am resisiting the urge to start decorating so instead I now begin what is to me the most difficult part: Phase 3 - A Place for Everything and Everything in it's Place.

Jan 23, 2009

Phase 1 - Admit Weakness

It is now 24 days in to the new year and it's about time I started putting some of my 2009 goals into action. Near the top of my list was tackling my overwhelmingly cluttered spare room. When I first stepped out to try running my own business I had high aspirations of turning my second bedroom into an insprational space full of the things I loved, projects I was working on and a very organized space to get things done. Ha ha ha! How quickly necessity of everyday life turned this dream into the dumping grounds for everything I wanted to hide when friends or family were stopping by. They say that admitting weakness is half the battle so in an attempt to start off on the right foot here is my confession:

So it wasn't quite a verbal confession but if a picture is truly worth a thousand words...need I say more? Seriously it's such a disaster!!! Tons of amazingly cool vintage things, fabrics, projects, etc are floating around in this mess but who would know?! And who knew someone who could be so super organized at her former places of employment could let her own office look this way...goes to show how much discipline it takes to work for yourself!

Be sure to check back later for Phase 2 - "The Purge."